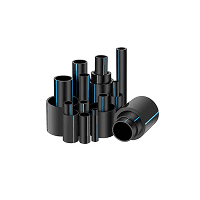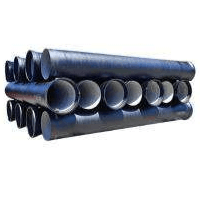
Two crews can install the same pipe, from the same pipes supplier in Kolkata, on the same street — and one system will run leak-free for decades while the other generates call-backs within a year. The difference is rarely the material. It is a handful of installation habits that experienced contractors treat as non-negotiable and rushed crews skip. Here are the ones that matter most, from trench to handover.
Prepare the trench like it matters — because it does
A buried pipe's worst enemy is a sharp stone against its wall under load.
- Bed the trench with 100-150mm of sand or fine soil — never lay pipe on rock, brickbats or hard clods.
- Keep trench depth consistent: shallow spots invite traffic damage, and abrupt level changes stress joints.
- Snake flexible HDPE pipe slightly in the trench rather than pulling it drum-tight — the slack absorbs thermal movement and settlement.
- Backfill in layers, compacting gently; keep the first 150mm above the pipe free of stones.
Respect the jointing method
Every jointing system has a discipline, and shortcuts show up as leaks months later.
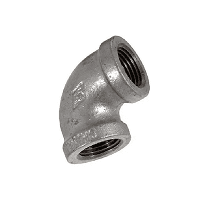
- Threaded joints on GI pipe: cut threads clean, use the right sealant, and stop at snug-plus — over-tightening splits sockets and stresses water supply fittings. Our post on 5 common plumbing mistakes covers these hand-skill errors in detail.
- Compression fittings: cut the pipe square, deburr, insert to full depth, and tighten the nut to firm resistance — not to destruction.
- Dissimilar metals: never thread brass to GI without proper compound and the right transition piece; galvanic corrosion works silently. Where each metal belongs is covered in our GI pipe vs brass comparison.
- Solvent joints on uPVC: dry, dust-free surfaces and full cure time before pressure — no exceptions on a deadline.
Receive and stage materials properly
Installation quality starts at the delivery truck. Whether you buy HDPE pipes online in coils or collect GI lengths from the yard, inspect on arrival: check markings against the order, look for transit gouges on coils and cracked ends on rigid lengths, and count the fittings against the material list while the transporter is still on site. Then stage the material sensibly — pipe on level stone-free ground under shade, solvent cement and rubber rings out of the sun, brass and small water supply fittings boxed and labelled by size rather than loose in a crate. Crews install what is within reach; if mixed sizes sit in one pile, mixed sizes end up in one wall.
- Verify class markings and sizes against the order before signing the challan.
- Reject or set aside damaged lengths immediately — do not let them migrate into the good stack.
- Keep threads protected: end caps on, fittings boxed until the hour they are needed.
Get the tapping points right
House connections fail at the main more than anywhere else. Clamp a properly sized brass saddle around the main, seat an IS-marked brass ferrule into it, and torque to specification — not beyond. On FHTC work this is also the joint the inspector examines first, along with the water meter that follows it.
Pressure-test before backfill: ten minutes with a gauge, or ten days with an excavator later.
Test before you bury
Never backfill an untested line. Fill the section slowly from the lowest point with an air valve or open tap at the high end — trapped air ruins readings and hammers joints. Hold the line at test pressure (typically 1.5 times working pressure — check the pipe's class in our pressure ratings guide) for at least 30 minutes and walk every joint. A stable gauge and dry joints are your handover evidence — photograph the gauge with the trench open.
If the gauge does drop, resist the urge to simply re-tighten everything in reach. Isolate by halves: close the mid-point valve, retest each side, and narrow the leak down section by section. Ten minutes of method beats an afternoon of guesswork, and it avoids over-torquing fifty healthy joints to find one bad one.
Protect what you installed
- Sleeve pipes through walls and slabs — direct-cast pipe cannot move and eventually cracks or leaks at the face.
- Keep buried metallic lines wrapped or coated at every field cut and thread.
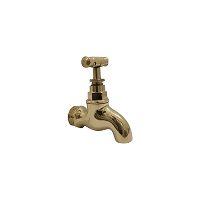
- Fit isolation valves at every serviceable branch while the trench is open — a brass bibcock or valve placed today saves a full shutdown later.
- Mark the route: warning tape above buried lines, and a simple as-laid sketch in the project file.
Hand over like a professional
Flush the system before connecting meters and fixtures — construction debris destroys meter mechanisms and valve seats. Leave the client the as-laid sketch, test record and the material list. That paperwork takes twenty minutes and turns disputes into lookups.
A five-minute walkthrough with the client closes the job properly: show them the isolation valves and what each one controls, point out the meter and how to read it, and hand over any spare fittings with the documents. Clients who know where their own stop valve is call you for the next project, not for the next emergency.
Installation day checklist
Start with materials that cooperate
Good habits work best with pipe and fittings that meet their standards — cleanly cut threads, true diameters and honest pressure ratings make every step above easier. Metplast supplies IS-marked pipes and brass fittings with delivery across Kolkata, Patna and Ranchi, and our team checks your material list for size and compatibility before dispatch. Send us your next project's list and install with parts that fit the first time.